Upgrade: Print without a pc for less than 10€ (part 1)

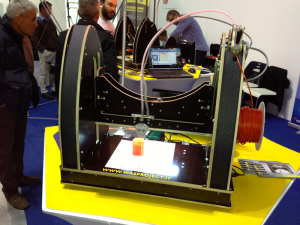
Ever wanted to run your 3D printer directly from SD card? This hack enables you to print from an SD card without the need of a PC.
Basically all you need to do is a cable to connect a SD module to your printer, but in this post I’m also going to show you how to create/adapt a SD module in case you don’t already have one.

You can use any SD module you like. MicroSD, SD, or even build your own! I'll show you how

You can use any SD module you like. MicroSD, SD, or even build your own! I’ll show you how

Despite I’m working on a control panel with some innovative features (look here), I’ve been asked to publish a super-cheap solution that can make you print without the need of a pc (or like in my case a Mac).
Printing without the need of a PC has many benefits, the first one of course it’s that… well… you don’t need a PC.
It could seem a stupid thing to say, but when you have to print a big file and you want to use your pc, you realize it’s not that banal after all 😉

Notice that Marlin firmware already supports a feature called “autostart” to automatically print a file from a SD card, but in my opinion it needs some improvments to make it more reliable for the scope we want.
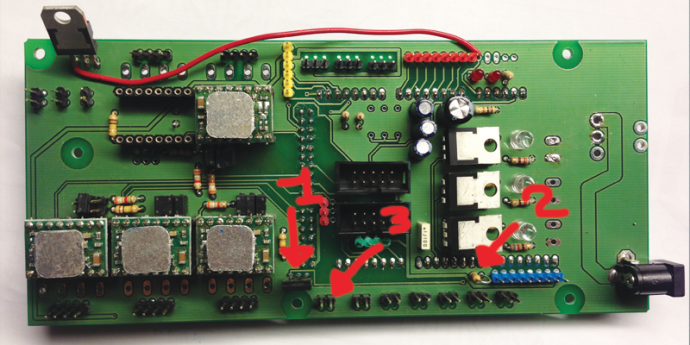
This first post (of 3) will illustrate the “hardware” part of the solution: the SD card reader and how to build the cable to connect it to your printer.
Part two will be about the changes of the firmware, and part three will be about how to provide an enclosure and some improvements for a even better experience.

SKILL: not for a rookie  if you want to build your own SD board, otherwise: not difficult at all
TIME: from 1 to 3 hours, depending on the options
TOOLS: a soldering iron, hot glue (optional)
COMPONENTS: 1 SD card module (or components to build it), 30cm of 10 wire ribbon cable, 1 2×5  female Molex connector, 10 female plugs
OPTIONAL COMPONENTS: 
1 LED, 1 resistor, 1 push button (see part 3)

Continue reading

Categories: 3D Printer, Improvements | Tags: , , , , , , , , , | Leave a comment

My (bad) experience with AlphaCrucis Store

I’ve made purchases from online-shops since the very beginning of the internet era.
I’ve bought from so many different shops all over the world that i can’t keep count, from small “garage based” sellers to international distributors and I’m an ebay user since 2000 with a 100% positive feedback.
During all this time I had just few problems, but this is the first time I feel like I have to tell you about a shop: AlphaCrucis.
It’s a really nice shop with nice products and prices! But the service and customer care… Continue reading

Categories: Just for talking | 3 Comments

Upgrade: new print-bed in aluminum honeycomb

This is my quick talk about the new “ultralight-superflat-nondeformable-honeycomb-aircraft aluminium” print-bed available on the WASP official website store.

Print-bed honeycomb

Honeycomb structure of the new aluminium print-bed

If you are interested in this upgrade you’ll require:

SKILL: having the opposable thumb…
TIME: 30 minutes
TOOLS: screwdriver
WHAT YOU NEED: 1 Aluminium Y Axis Print-bed, 1 Protective film (optional) 

More or less a month ago my printer has been upgraded with this brand new print-bed that replaced the original plywood one.
It’s made of an aluminum alveolar plane that in the hands feels really ultralight, actually I didn’t weighted it but it’s waaaayyyy lighter than the previous one and at the same time it also feels solid and durable.
Continue reading

Categories: 3D Printer, Improvements | Tags: , , | 2 Comments

New year pool!! What do you think about this blog?

Well.. I know I didn’t post a lot, but I’m questioning myself if this blog can be of any interest for you.
I’m curious to know it and get some feedback from you so I can better focus my future post.
Thanks four your valuable feedback!
Have a great 2013 😉
Continue reading

Categories: Just for talking | Leave a comment

Preview – A new panel on the block: POWERPANEL

This post is about a new panel I designed and the code to control it.
It features all the simplicity and functionality of the Utilpanel/Ultimaker controller PLUS:
3 configurable buttons, for frequently used functions
1 Emergency Stop button
1 Expansion port to connect and control external devices (like photocameras, heated bed, probes etc.)

powerpanel_alpha

POWERPANEL first alpha version

THIS IS THE STORY (You may want to jump this part)
After few days I played with my new 3D printer I discovered that controlling it without a pc (or in my case a Mac) would have been really cool.
Not having the Mac forced to sit colse to the printer for hours is a real plus. Also having all the important information about the printer at a glance is always useful and if you are attempting to calibrate it (think about the eSteps), using a controller really speed up things!
Continue reading

Categories: 3D Printer, Improvements, News | Tags: , | Leave a comment

Upgrade: Mod your POWERWASP to support variable fan speed

A controllable fan (on/off and speed) it’s a nice feature that really improves your prints and, once setup, it can operate without any assistance.
In the POWERWASP, fan is directly connected to the regulated 12v output that’s always on. Since this printer it’s really well made you can attach or detach you fan anytime, also during the print, basically turning it on and off as you like. For example you can add the fan after the firsts layer, but still you need to assist you printer and… is just off or full power. To take advantage of the features of your slicer software (like cura or slic3r) and your Marlin firmware, just follow this tutorial.
After your hardware upgrade you may want to update your firmware to support this feature in a better way, but I will tell you about this later on.

SKILL: some confidence with your printer and ability to solder trough holes components
TIME: 1h (actually I don’t remember how much it took, but it’s more than reasonable)
TOOLS: nothing special, just scissors, screwdriver and a soldering iron
COMPONENTS: one BD679 transistor and one 1k resistor

The POWERWASP printer comes with an Utlimaker shield clone (rev. 1.5.4) that uses a dedicate pwm pin (D7 on Arduino) to operate the fan to cool the hot-end.
You can find more info and schematics here: http://reprap.org/wiki/Ultimaker%27s_v1.5.4_PCB

Ultimaker shield rev. 1.5.4

Ultimaker shield rev. 1.5.4

Power Wasp Shield

POWERWASP shield

As you can see from the pictures above the two boards are identical except for one thing: the POWERWASP shield has all the components needed to run the printer and not those unused (in perfect WASP style ;-)) so to run this feature I had to add them by myself. A really easy operation if you know how to solder trough hole components.

Step 1:
Open the cover on the bottom of the POWERWASP and disconnect all the wires from the shield (I suggest you to mark them carefully to easily put them back on the right places 😉

Step 2:
Cut the power supply wires that are directly soldered on the pcb. Once terminated the mod, instead of solder them back, I added a connector just in case I will ever need to remove the board again, but that’s optional: you can just solder them back to the pcb without any problem.

PowerWasp shield update for variable speed fan

POWERWASP shield modified to use pin 7 to control a variable speed fan. Sorry I took this picture upside down compared to the others…

Step 3:
Solder the transistor BD679 in the right position (see picture “number 1”) (Q4 in Ultimaker pcb schematics) Continue reading

Categories: 3D Printer, Improvements | Tags: , , , , | 4 Comments

Add variable fan speed using an Ulimaker shield & Marlin firmware

Using a fan to cool the extruded plastic helps a lot to get better prints, but having it at a fixed speed it’s not the best way at all.
A variable speed fan can be used more efficiently during different moments of the printing process: first layers, bridges, small layers…

Variable speed fan

My variable speed printing fan at work 🙂

THE PROBLEM: on my board the pin dedicated to regulate the fan speed (via pwm) gets its current from an unregulated source. The Ultimaker board uses pin 7 to control the fan speed, but this pin has not a 12v maximum tension, instead it gets it power directly from the power supply  (in my case a 18v transformator).
If I had used this feature out of the box my fan would have received a voltage of 0/18V not suitable for the popular 12v fan commonly used for this task.

POSSIBLE SOLUTION 1: Use a 24v fan, but this would also have been impractical since at 18v (maximun voltage of my transformer) the fan would have worked at a very low speed.
In fact, computer fans have a working range that’s not 0 to 100% volts since you need to kick in some power to make it turn first, for instance my fan can effectively operate in the range of 5 to 12v. Under 5v my fan doesn’t even start turning. But once it does you can lower it a little more, I will discuss it later on this post about this.

POSSIBLE SOLUTION 2: in your slicer program limit the maximum fan speed to a value safe for your fan. It works, but it’s not really practical nor intuitive and if you are using a controller (like the utilpanel, ultimaker controller ecc.) it’s not safe at all since you coul easily burn your fan using some functionality these controller provide.

pwmpin

Testing the pwv tension before attaching the fan.. safety first 😉

MY SOLUTION: I modified the firmware and set a parameter to define the maximum voltage suitable for my fan. Now I can safely use any slicer/controller in their full range of 0/100% fan speed. The firmware will then handle all the conversions for me.
Continue reading

Categories: 3D Printer, Improvements | Tags: , , , , , | Leave a comment

Upgrade: POWERWASP extruder upgrade

This upgrade uses a spring loaded pressure plate to uniform feed regardless of filament thickness. It also compensate some fast retraction problems I had in precedence.

extruder

I found that sometimes the filament you buy it’s not always “perfect”… the diameter should change just a little (0,1mm) but what I got recently was not that perfect…
Finding the right amount of pressure it’s a matter of experience, but if the diameter of the filament varies too much, it’s possible that sometimes it will be too loose or too “grindy”.
This is a really simple upgrade that solves brilliantly the problem.

SKILL: nothing special, if you bought a 3D printer this is a pice of cake 😉
TIME: 30 minutes if you drink a coffe meanwhile
TOOLS: nothing special, just scissors, screwdriver and a soldering iron
WHAT YOU NEED: 1 spring (11mm diameter), 1 M5 bolt longher than 7cm, 2 printable caps (I prepared theese: http://www.thingiverse.com/thing:36778)
Continue reading

Categories: 3D Printer, Improvements | Tags: , , , | 1 Comment

Into the 3D printer world

I’ve always thought “soon or later” I’m going to buy one.
But how much is going to cost me? And especially: how much time is it going to take??
Well.. it’s time to discover it since after my visit to the Makers Faire in Milan i finally bought one.

Power Wasp at Makers Faire Milano

Power Wasp at Makers Faire Milano

There where many models exposed and all of them looked pretty nice and “solid” , but my preferences went to a POWERWASP because I had the opportunity to talk to it’s creator and I felt it was nice to be able to have a good contact with the man who knows the printer as nobody else. This will be helpful in case of any problem or in future discussion about how to improve it. Off course the net it’s full off people ready to share and help you in case of needs. There are forums, blog etc. but knowing the man who developed the idea of this printer it’s, on my advice, a real plus!

Power Wasp with extruder

Power Wasp with extruder

He’s a very smart man with solid ideas. Not seeking for the most fashionable or trendy thing but, looking and adopting only the solutions that really works and add quality to the final result.
The printer is fabulously built, the most solid I’ve seen up to date, and it’s full of his experience in the CNC world. In fact this printer is so well designed that can also be used for this scope holding a tool like a Dremel or Proxxon up to 5 kg!!
Exactly: you can print things or carve things!! A real building machine!! Fabulous 🙂
I’ll soon try to build a controller using this machine to create the pcb and the case! Fabulous!

I’ll post an article on this printer as soon I have the time to document it and not to play with it ;-), but meanwhile, have a look to it’s website and the incredible specs of this machine: http://www.wasproject.it/w/power-wasp
You will find it a little different compared to the others, and believe me: this machine rocks!!
Full of power and extremely precise.
It’s design remember me the extremely intresting Ultimaker printer (same electronics, and same Bowden extruder solution ), but it has a larger printer plate of 260 x 200 x 210 mm, a printing resolution of 50 micron and a printing speed of 200 mm/s. It’s extrusor its completely different and it’s so smart! and… ok.. I really have to do a post just for that….
By the way, I’m now fully into this new, exciting and… time consuming world!

Categories: 3D Printer | Tags: , | Leave a comment

Sometimes it happens you want to share..

.. and it happens you find the reasons to finally do it.
It’s not the first time I think I have something to share, but even the closest time I came to that.. well, then I finally failed for some reasons.
Maybe because I couldn’t reach that level of ‘presentable status’ I thought it was necessary, or maybe because I found a better way to spend my time (after all it’s not a job) or simply just because I thought that nobody would have been interested in my work.
Well, this time I want to try to write things the way they come, imperfect as they are (after all it’s not a job) and just for the shake of doing it, without questioning myself if will be of any interest to anybody.
Continue reading

Categories: Just for talking | 1 Comment

Blog at WordPress.com.